Many iPhone 12 owners notice shorter battery life after a few years. The device drains quickly or shuts down unexpectedly. Learning how to replace iPhone 12 battery can bring back all-day performance. This guide covers everything from signs of wear to full replacement steps. It includes safety tips and options for similar models. As of late 2025, Apple supports repairs with new tools for genuine parts. You can choose professional service or careful DIY. This post draws from reliable sources like iFixit and Apple support pages. It helps you decide the best path.

Signs Your iPhone 12 Battery Needs Replacement
Batteries wear out over time. Check Settings > Battery > Battery Health for clues. If maximum capacity falls below 80%, performance may drop. Sudden shutdowns happen even with charge left. The phone gets warm during normal use. Charging takes longer than before. A message says service is needed. Swelling pushes the screen up slightly, stop using it right away. These signs show the battery has reached its limit after hundreds of cycles. Replacing it fixes most issues.
Professional vs DIY Replacement Options
Apple charges around $89 for out-of-warranty iPhone 12 battery swaps in 2025. Authorized providers use genuine parts. They keep full features like accurate health readings. Third-party shops often cost less, from $40 to $70. Quality varies widely. DIY saves money with kits from sites like iFixit. Kits include tools and batteries for under $50. Risks include damage or warnings on non-genuine parts. On iOS 18 and later, authentication helps with original batteries. Weigh your comfort level and warranty status.
Tools and Parts You’ll Need
Gather the right items before starting. A pentalobe screwdriver opens the bottom screws. Use a suction cup and plastic tools to lift the screen. Tweezers help with adhesive strips. Get a replacement battery with pre-installed adhesive. Kits often bundle everything. Isopropyl alcohol cleans old glue. Have a clean workspace ready. Avoid metal tools near the battery to prevent shorts.

Safety Precautions Before Starting
Back up your data first via iCloud or computer. Discharge the battery below 25% to reduce fire risk. Work in a well-lit, static-free area. Wear eye protection. Never puncture the battery. If it swells, seek professional help. Follow steps carefully to avoid damaging flex cables or waterproof seals.
The Ultimate Guide to Replace Your iPhone 12 Battery
Follow these steps closely for how to replace iPhone 12 battery safely.
Step 1: Power Off and Remove Bottom Screws
Turn off the phone completely. Remove the two pentalobe screws at the bottom edge. Keep them organized.
Step 2: Heat and Lift the Display
Apply heat to the edges with a hairdryer or heat gun on low. This softens the adhesive. Place a suction cup near the bottom. Pull gently while inserting a plastic pick. Slice through the adhesive slowly around the sides.

Step 3: Open the Display and Disconnect Connectors
Prop the screen up like a book. Remove screws covering the battery and display connectors. Disconnect them carefully with a spudger.
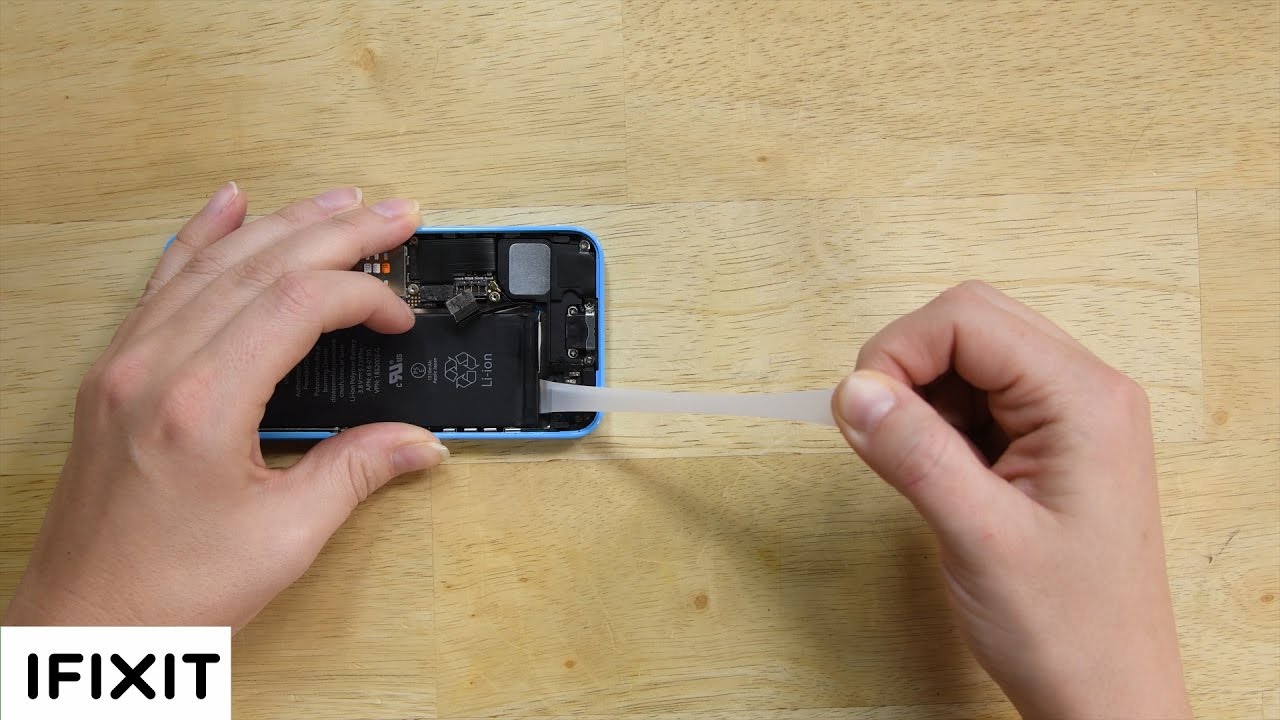
Step 4: Remove the Old Battery Adhesive Strips
Locate the black pull tabs under the battery. Pull them steadily at a low angle. Twist excess onto tweezers if they stretch. Remove all strips cleanly.
Step 5: Lift Out the Old Battery
Gently pry the battery if needed. Avoid bending it. Clean any residue with alcohol.

Step 6: Install the New Battery
Place the new battery in position. Connect its flex cable.

Step 7: Reconnect and Test
Reattach connectors and covers. Power on to check function.
Step 8: Seal the Display
Apply new adhesive if needed. Close the screen and install screws.
Differences When Replacing iPhone 13 Battery
The process for how to replace iPhone 13 battery follows similar steps as for how to replace iPhone 12 battery . The iPhone 13 has a larger battery and slightly different layout. Adhesive placement varies a bit. Connector covers may have more screws. Overall time and difficulty stay close. Use model-specific guides for exact details.
Common Mistakes
Rushing the adhesive removal tears strips. Pull slowly and evenly. Forgetting to disconnect the battery first risks shorts. Always start there. Using metal tools punctures cells. Stick to plastic. Skipping backup loses data if issues arise. Overheating the device warps parts. Apply gentle heat only.
Post-Replacement Tips
Charge to 100% and keep plugged in for two extra hours. This calibrates the new battery. Monitor health in settings. Avoid extreme temperatures. Update to latest iOS for optimizations.
Conclusion
Following this guide on how to replace iPhone 12 battery restores reliable performance. Choose the method that fits your skills. Professional service offers peace of mind. DIY works well with patience. Your iPhone 12 can feel new again.
You might also like: How to Turn on Location Services iPad
FAQs
1.Is it safe to replace the iPhone 12 battery myself?
Yes, if you follow steps carefully and use proper tools. Risks exist, so consider professionals if unsure.
2. How much does Apple charge for iPhone 12 battery replacement?
Around $89 out-of-warranty in 2025.
3. Will I get a non-genuine battery warning after replacement?
Possibly with third-party parts. Genuine ones avoid it on recent iOS.
4. Can I replace the iPhone 13 battery the same way?
The steps are very similar, with minor layout differences.
5. What if my battery is swollen?
Do not attempt DIY. Take it to a professional immediately for safety.